Friday, January 30, 2009

Blog This - and where is my cell phone?

Talk about a family of blondes!

I sat down to my computer a while ago to catch up, since it had only been an hour or so since I had last looked at Facebook, email, my own blog and the other blogs I frequently check, and I was darn near withdrawal. I use Firefox and along with it several little add-on programs or plug-ins that are available with my favorite browser. One plug-in that I use is the Foxforecast add-on that allows me to keep a continual check on the weather. A really nice feature of this plug-in is that I can set up profiles for various locations that I have an interest in... translate to read places where various members of my family live. With a click or two of my wireless mouse, I can get a quick view of the current weather, as well as a simple forecast for the rest of the current day and into the next. I like it! I don't just like it, I love it!

So while I was checking out Facebook, I noticed one of my local friends, right here in good old Funroe, Louisiana where I'm at, had written a status update about being cold. So I immediately checked my handy dandy Foxforecast line at the bottom of my screen and it read 15° and I am like holy moley, when did that happen. I didn't even know the temps were supposed to fall today, especially that low. The high for the next day was only forecast to be in the low 30s. No wonder poor my friend was cold... bless her heart! For my yankee fans, that's a southern phrase meaning she's my friend and I care about her or it could mean that she may not really be a friend but I'm gonna bless her heart anyway... that's what southerners do... they bless your heart and I've learned that it is a good thing to bless people's hearts! Anyway... let's move on.

I'm thinking about leaving a comment to my friend who's freezing to death, and no wonder because we are not prepared for those kinds of temperatures here in the deep south, when the phone rings. It's my daughter Dee, who lives in Bossier City on the other side of the state. I'm about to ask her if she's freezing to death over there because they actually had a little snow on that side of the state a couple of days ago so I figured it must be even colder where she's at than where I am. Then it hit me... like a ton of bricks... like ice falling from the eaves of buildings... my profile is not set on Monroe.

This is a view of how it looks when set on my local profile -- click to enlarge

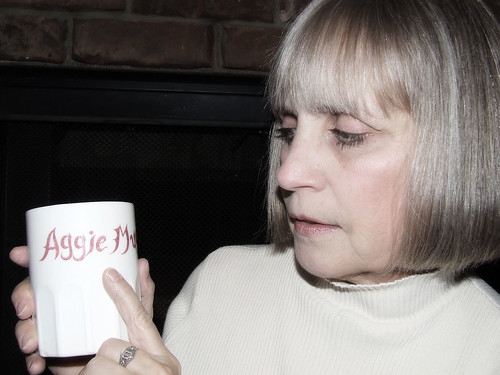
Sure enough, I clicked the button and realized that I was seeing weather for my hometown, Muncie, Indiana, where my mother and one of my brothers still live. In a moment of sillyness, I was dumb enough to tell my daughter what I had done... immediately she insulted me by laughing out loud, reminding me how old I am and that amid the graying strands, there is still a lot of blonde there! Hmmmph! She even went so far as to tell me to blog it! Brat!

After an ensuing loving conversation round of name-calling, she told me that she and Sarah had reached their destination and she would talk to me later. I could still hear the sneering condescension in her voice and a final chuckle at my expense when she told me to wait a minute as she ticked off each item she wanted to take in with her... keys, purse, wait, wait... where's my cell phone! (duh, in your hand?)

So who's the old blonde now sweetie?

REVENGE IS SO SWEET!

consider it blogged baby... consider it blogged!

Labels: , ,

posted by Marsha at 5 Comments

Wednesday, January 28, 2009

Creating Photo Booth Strips

*** quick edit made to emphasize the download location / link to Nicole Seitler's Photo Booth Strip template file.

Several people commented on the photo booth posts I did earlier here and here, indicating an interest in how I created the strips. I will attempt to explain in this post how I accomplished that in the graphic program I use, Paint Shop Pro (which I will also refer to as PSP). These instructions assume that you are comfortable working with layers and moving between multiple open images on the screen and that you know how to use basic tools and commands in PSP.

You can use other programs to complete this project if your software allows for the creation of layers within a file and if you know how to adapt the commands and tools used by PSP to the commands and tools your software uses to perform the functions I am describing. If you're not comfortable with my instructions or can't convert them, you can Google for instructions for creating a photo booth strip specific to your software, be it Photoshop, Elements, Irfanview, GIMP, etc., or feel free to contact me through the comments section or by email and I will try to help you find what you need. I'm sure there are better written, more complete, easier to understand tutorials out there for this type of project but I said I would try and I am good for my word (as well as being good and wordy)!

Again, my instructions are based on the commands in Paint Shop Pro, (I use version X2 but you should be able to do this in all versions of PSP). I've used PSP for years and I highly recommend it as it does almost everything that Photoshop CS software will do at a fraction of the cost and generally is easier to learn. It far exceeds the ability of Photoshop Elements, which is similarly priced to Paint Shop Pro. I will intersperse some screen shots in with the instructions to try to help clarify what I am describing. With that said, we'll get started.

The first thing you need is a template for the strip. You can Google for a photo booth strip template or simply go to Sugarplum Paperie to download the zip file which contains the template I used. Extract the template to your hard drive, noting where you are saving it to for access later. The zip file includes both a black strip and a white strip with four openings available in each strip for photo insertion. You can use either one according to your preference.

1. Once you have a strip template, choose the photos you want to insert in the strip and open all of the images, including the strip in your software. If you need to edit the photos you are using in the strip, please do so before you begin the process outlined below. (For the sake of brevity, which Lord knows is not my strong point, I will limit my directions to placing one photo in one opening with the understanding that you will complete the remaining three photos in the same manner.)


Click to enlarge the photo to see more detail.

This is how my program looks when I have opened the template file and my first photo (which I chose to crop before inserting into the strip as you'll notice in the next screen shot).


2. Making the photo strip your active image, grab the magic wand selection tool from the toolbar, which in my workspace is placed down the left side of the screen; it may be elsewhere in your version(see it highlighted in the screen shot below). Touch the magic wand anywhere in the area of the first or top opening of the photo strip. If you don't see the magic wand on your toolbar, click on the little down arrow of the selection tools section of your toolbar and a sub menu will pop up with all of the available tools displayed and choose it there. Once you have selected the opening, you will see that the open area inside the selection is surrounded by what is commonly termed as 'marching ants'. Then go to the Selections menu at the top of your screen and choose Modify, then Expand, then Expand Selection by two pixels. The reason for this is to make sure that your photo will completely fill the opening and not have any blank area around it when the photo layer is moved beneath the template layer.

Click to enlarge the photo to see more detail.

This image shows the selection tool I used (the magic wand) on the toolbar down the left side of the screen (circled in yellow highlight) and the cropped version of my first photo. On the right side of the screen image, I circled in yellow highlight where my new layer shows up in the layer palette. At this point the layers are named raster 1 and raster 2. I recommend renaming your layers just to keep track of where you are in the process. The template image is the active image in this screen shot. If you view a larger version of the screen image, you can see a dashed line representation of what's termed the 'marching ants' around the selection of the first photo opening. In the open program, the selection will actually be moving around the selected area hence the term 'marching ants' but since this image is static, you can't see that motion here. The new raster 2 (photo) layer will ultimately be pulled under the existing raster 1 (template) layer as you will note in a later screen shot.

Just a quick note on cropping and the shape or size of the photo to be inserted. If you decide not to crop your image -- and please understand that you do not have to -- just know that if you choose to insert a photo that is obviously not similarly shaped to the opening, it might scrunch up and distort the photo image more than you would like. Example: your photo is in landscape format (wider than longer) going into a space on the template that is portrait shaped (longer than wider), it will distort when you paste it into the selection. I prefer to crop to get the best view of the photo I am using and to also make sure it is somewhat similar in shape as the opening on the template I am going to insert it into. You do not have to be exact, although you can be if you want. I don't go to that much trouble. You can also make any other edits you wish to your photo before placing it into your strip. I won't describe all the possible edits here as I think a 10 page post would be just a tad much (as if this isn't already stressing the limits of any normal human to stay focused). I generally make minor edits to enhance most photos I use in any project. I probably have a couple of more age lines than you see in this photo! *grin*


3. Keeping your selection active, go to the Layers palette (your photo strip template file should still be active) and click on the add new layer button or you can go to the Layers menu at the top of the screen and select New Raster Layer. I would suggest renaming this new layer something like 'photo1' or 'photo layer 1'. You will eventually have 5 layers total, one for the template, and four image layers, one for each photo you will insert in the strip. Naming them will help you keep them straight. You can do that when you add the layer or later, whichever is easiest for you.

4. Making sure that you have the new layer active in your template file (it will be highlighted in your layer palette) move to your first photo image and simply choose copy from the edit menu, then return to your photo template image and from the Edit Menu at the top of the screen, choose Paste Into Selection making sure you are on the new layer you created for the photo. Regardless of how large your photo image was, it will insert fully within the space defined by the marching ants that you selected earlier. Go to the Selection menu at the top of the screen and click on Select None and the marching ants will disappear.

Click to enlarge the photo to see more detail.

This is how my screen looks after I have pasted the first photo into the selected opening of the template. If you look at the layers palette on the right, you can see the image of the photo on the new layer.


5. Return to the layers palette and highlight the photo layer and pull it under the template layer. You can also change the order of the layers by going to the Layer menu at the top of the screen and select Arrange. You can move the active layer to whatever position you would like in the file. Rename your layer(s) if you have not done so.

Click to enlarge the photo to see more detail.

This screen shot shows how the photo layer has been moved under the template layer and the changes in the layer names. I highlighted the entire area around the layers palette and underlined the layer names in this shot.


6. At this point, I would suggest saving the file in pspimage format. This format preserves the layers format where saving as a jpg or png will save the file as a single layer image. If you are not using Paint Shop Pro, the image format for saving in layer format will be called something different. Just make sure you choose to save as the file type required by your software to retain the layers. You will eventually merge the layers at the end of the process but until you have completed the project, you will want to be able to get your work back if you should make a mistake.

Congratulations, you have just completed the first image insertion. If you look in your layer palette area, you should see two layers, both with images now. The top layer should have your photo strip template and the layer below it should have the image you just pasted into selection. If the photo layer is on top, move it below the template where it should be. The image file itself will display both layers at the same time, looking like a single entity, but rest assured, both layers exist if the layers palette shows two layers (you can even turn individual layers on and off on the layers palette if you want).

All that's left to do now, is to repeat the steps in the preceding paragraphs (from step 2 through 6) for each of the remaining three photos. Just remember to create a new layer for each photo naming it accordingly, select the next opening in the photo template file, copy the next photo then paste each photo INTO the selected area of the template file on it's own layer and save the file as a pspimage after each photo is added. That's the condensed version... and this version didn't take 242 paragraphs to explain it all!

In PSP, as in most software, you can accomplish any task in a variety of ways. I simply tried to explain a way (or two) to accomplish each task in the most common manner or ways available. I personally use many shortcuts within PSP but felt like that would be even more confusing if you're not familiar with my particular methods. If you know other ways to do the same thing, by all means, work in the way that best suits you or that you are most comfortable with.

I hope that these instructions are clear enough for you to follow and that you like your results well enough to display it on your blog or elsewhere. If you wish, you can send your results to me via email and I will will be glad to post them here.

Please don't hesitate to contact me for help. I'm relatively new to tutorial writing so any questions you send to me will help me learn to write clearer instructions. If you find that you just can't do it at all, let me know that too and we can work together to determine whether the instructions are just too complicated or if I need to rate it as being for more advanced users. Remember, you're helping me here too!

I know I tend to be wordy and hope I haven't tried to over-explain and ended up confusing you instead of simply showing you how to complete this project. Let me know if that's the case so that I can do better the next time (if there is a next time that is). I wish any of you who attempt this project good luck and I look forward to seeing your results!

Credit to Nicole Seitler at Sugarplum Paperie for the photostrip. Be sure to visit her site, even if you don't want to try this project as she has some lovely creations and other freebies to share. Just be sure to thank her in her comment section and if you do choose to download something as a result of my link, please let her know that you came from my blog!

Labels: ,

posted by Marsha at 4 Comments

Wordless Wednesday - January 28, 2009


I'm recycling this photo from a previous post My Ugly Mug. I figure this mug deserves a little more attention! It may not have won the contest, but it has a special place in my heart (even if it is kept on the top shelf of the corner cabinet pushed all the way to the back).

Check out Wordless Wednesday to see a list of all participants in this weekly meme.

Labels:

posted by Marsha at 16 Comments

Tuesday, January 27, 2009

The Tutorial Will Post Tomorrow!

Just to let you all know, I'll be posting the tutorial on how I did the photo booth strips sometime tomorrow, Wednesday, January 28, 2009. It will be after the Wordless Wednesday post goes up so check back later in the day if you are interested.

Labels: ,

posted by Marsha at 0 Comments

Monday, January 26, 2009

My Ugly Mug

Flash back to Mother's Day 1979. Earlier that year, my husband and I had separated and I found out the day before Mother's Day, that he had not taken them anywhere to get me a card or gift. The girls asked if I would take them shopping so they could buy me a present. I loaded them up, along with their brother and headed into town. John and I wandered around while they were looking, waiting for them to make a loving and thoughtful decision about what to purchase with their limited funds.

When they came out of the last store with package in hand, they were giggly and seemed pleased with themselves. I was touched by their thoughtfulness and knew, that no matter how small their gift might be, that it was symbolic of their love for me. I just knew... I just needed to believe... that while my marriage was falling apart, my relationship with my children would always sustain me and lift me up, even as my self-confidence waned. I couldn't wait to open my present that year!

This is what they gave me on Mother's Day!


The truth is, I was so surprised by this gift that I'm sure I didn't react as well as a mother should when her children give her a present that is, let's say less than desirable. I was overly sensitive at that point in my life and suppose I was afraid that my children thought of me as an Aggie joke! How silly my reaction seems to me today.

This mug has been a source of jokes in our family for the past thirty years and when I told the girls I was going to submit it for a contest, they couldn't believe that I still had it. In all honesty, this mug has kept me humble over the years and I wouldn't part with it for anything.

I talked to each of my girls today and asked them what they were thinking back then. I loved their comments.

Jamie:

"I was just a kid and I thought it was funny."
"Besides that, it was cheap."
"It was Dee's idea!"
"I always wondered why the clerk kept asking if that was what we really wanted to give you."


Dee:

"Mom, I was only nine or ten."
"I was a follower back then, it was Jamie's idea."
"I didn't even know what an Aggie was."
"We really tried mom, honest!"


While I was talking to Jamie, she had to do something and gave the phone to Kayla, my youngest granddaughter who had just turned seven a few weeks before. I asked her what she thought about her mommy and aunt Dee buying me a really silly present when they were little girls and what she thought I should do to them for being so silly. She didn't hesitate. She simply told me that I should say thank you because her mommy told her to always say thank you when people give her gifts, even if the gift isn't exactly what she wanted. See what I mean about this mug. Even when viewed through the eyes of a seven year old, I am humbled by it and reminded that I am a very fortunate woman.


So thank you girls, thank you for the mug and for years of love and caring and joy. I'm only sorry that it took thirty years to find a purpose for it. Please know that I love my ugly Aggie Mug. Someday, I hope to find two more just like it!

John, just be glad you were only four or I might be looking for three of them!

********************** PLEASE GO VOTE **********************

Go to 2nd Cup Of Coffee and follow Linda's instructions on how to vote! Please, vote for me, as it will go a long way toward improving my scarred relationship with my children and how people of the world view Aggies in general. Perhaps I could get a new mug with the Starbucks gift certificate that the winner will receive... I mean really, have you ever tried drinking from an Aggie mug?

Labels: , , , , , , ,

posted by Marsha at 19 Comments

Tuesday, January 20, 2009

The Ugly Mug Off

2nd Cup of Coffee is sponsoring a contest!


Click the pirate mug below to find out about Linda's Ugly Mug Off contest. She's offering a Starbucks Gift Card to the entrant that has the ugliest mug (coffee mug that is). I plan to enter an almost 30 year old coffee mug in the contest. I'm not sure that it will be the ugliest mug but I think I will be in the running for the most pathetic story behind my mug and why I've kept it all these years.


I plan to post my entry before the voting begins on Monday, January 26. Lidna's readers will be voting in the comment section of her blog for the winner. Stop by Lidna's place for the details and dig out your ugliest mug and enter this one. I think this will be a fun contest and I'm looking forward to seeing who really has the ugliest mug!

*** This is a sticky post that will remain on top of the blog for several days. Please check below for possible new posts. The pirate button will be available in the contest section of my sidebar until the contest is over.

Labels:

posted by Marsha at 2 Comments

Thursday, January 15, 2009

Working On The Tutorial and Other Things

I'm at my daughter's home in Bossier City, staying with my granddaughters while their mommy gets a little me time. Once I got things squared away today, the girls off to school, dishes done, laundry finished, etc., I started on the written portion of the tutorial to create the photo booth strip. As usual, it is taking on a life of it's own and what I thought would be relatively simple, I've managed to turn into a major production, the likes of which haven't been seen since Titanic debuted a few years ago. Well, maybe not that bad, but I just keep adding more and more directions, instructions, screen shots because I want to make sure I am being clear. Which means I'm probably muddying the waters instead! I just didn't want you to think I had forgotten about it.

I hope to finish the tutorial sometime tonight or tomorrow if I have time. Right now, I have to pick Sarah up from school as she had a make-up test today and the older girls will be home shortly. We're going to meet their dad for dinner tonight and I need to get ready for that. Tomorrow, I will head back home sometime after they get off to school as they will spend the weekend with their dad. So time is short until I get settled back home but I will do my best to get it finished and posted.

I just want to add that I am feeling the love from the super nice comments about the photo I posted for Wordless Wednesday. You guys rock and it makes an middle-aged old lady feel pretty good to hear such nice words.

Labels: ,

posted by Marsha at 3 Comments

Wednesday, January 14, 2009

Wordless Wednesday - Sunset Silhouette

Sunset On Hernando Beach, Spring Hill, Florida
you can view a larger version of this file by clicking on the photo and accessing it through my flickr account

I took this picture on the beach at sunset on Sunday, December 28, 2008, the day after we arrived at my daughter's house in Florida. We barely made it there in time to get pictures before the sun disappeared completely. The photo was edited in Paint Shop Pro to enhance the color and create the silhouette effect. I love silhouettes.

We saw several dolphins near the shore shortly after this picture was taken but I wasn't able to get through the throng of people in time to get a clear photo of them.

Check out Wordless Wednesday to see a list of all participants in this weekly meme.

Labels: , ,

posted by Marsha at 16 Comments

Sunday, January 11, 2009

Another Photo Booth Post


Here is another photo booth strip I made from pictures taken at my daughter's house in Florida this past week. The bottom two were taken in "Kayla's Photo Booth" that we made at the end of their hallway by hanging a blanket to create the background. The other two pictures were taken elsewhere or at different times during my visit and I included them in this strip because I thought Kayla would like them.

The top photo in the strip is Kayla with her older sister Anna on Kayla's birthday. The next one is of Luger, their 'puppy'. Kayla loves Luger! Once we started taking pictures for her photo booth strips, Kayla decided she wanted to take a picture of me. I helped her a little but she had to make sure I was in the frame before she clicked the button. She did a pretty darn good job! The tripod helped both of us as I used the optic zoom to make sure we got closeups. Don't ya just love my hair... I didn't expect to be in the pictures and didn't think to run a comb through my hair before I turned the camera over to her! I had fun hamming it up though! I also tried using the timer and I got one really good picture of her alone using the timer when I experimented with it but I managed to change the setting when I tried to get into the picture with her and only had two seconds to get in. I only caught part of one of my arms and part of my chin... too funny! It will be good for out-takes if I ever put together an album of these pictures though! I love the pose Kayla struck in the last picture. She is a natural and we had a great time together doing this. Our photo booth session will be a special memory for me from this trip!

I wanted to see how the black and white would look against the color version. I'm not very happy with the noise I added to make it look more like an old photo strip. I didn't get the effect I was after with that but was too tired of messing with it to change it. I still need to do a final version of the strips to print out and send to her so I'll make corrections then. I will probably do both color and black and white to send her.

I will do my best this week to write up instructions on placing the pictures in the strip for those who asked.

The template I used for the photo strip was downloaded from the web. I failed to give credit for it in the last post but here is where you can get the strip if you decide you want to do this project someday.

Nicole Seitler
www.SugarplumPaperie.com

The zip file has both a black and a white strip available and is a free download.


Labels: , , , , , , , ,

posted by Marsha at 3 Comments

Wednesday, January 07, 2009

Wordless Wednesday - Photobooth

We set up the camera and played photo booth Tuesday night. I only had time to make one example strip so Kayla could see at least one set before I leave in the morning.


I have so many more pictures to put into strips when I get home and will probably try to create a new strip or find a better template online. When they are finished I will print them out and send the finished photo booth strips to Kayla. Playing photo booth was fun. You don't have to be a good photographer to do this either so there are no real excuses for not trying this activity!

I had so much fun with Kayla this trip and really enjoyed visiting with her and Anna and Jamie and Shawn and even Luger. I am going to miss them as soon as I pull out of the driveway!

Labels: , , , , ,

posted by Marsha at 19 Comments

Saturday, January 03, 2009

The Youngest, The Oldest, It's All About Wheels Baby!

This past week brought new wheel experiences to my oldest granddaughter and my youngest granddaughter.

Erin, my oldest granddaughter, who turned 16 in October, rode down to Florida with me a week ago, along with her mother and two sisters, to pick up the car she (her parents actually) bought from her Aunt Jamie. Erin helped drive part of the way down and eased the burden of that 13-14 hour task that her mom and I were sharing. I felt safe and comfortable with her at the wheel but have to admit to having some concern about seeing her turned loose on her own with a 2,000 pound weapon vehicle.

We all know that this car is not the dream vehicle of most 16 year old girls but it is in good shape, was purchased at a bargain price and certainly beats feet (as I used to tell my girls about the company vehicle I was able to pick up when they were that age for a great price).

Here's a shot of Erin sitting in her vehicle after we finally made it to my daughter's home in Florida.


Kayla, my youngest granddaughter, also found freedom with wheels this past week as she gave up the training wheels on her bicycle. I really enjoyed watching the expression on her face as she realized she was doing it all on her own. For a six year old (who will officially turn seven today), this is as much freedom as her older cousin has with her new car.

Here are a couple of shots of Kayla feeling the need for speed while riding her bike in the church parking lot down the road from their home. There's also a video of her making an Evel Kneivel jump over a curb that I will upload and post later.


(oh, please don't tell her momma that I forgot her headgear and pads)


I am just wondering what happened to the Barbie Jeeps, tricycles and wagons? For that matter, we were pushing both of these girls around in strollers not that long ago. Time is flying by and I can't seem to keep up with how fast they are growing up. No wonder I am feeling old!

Labels: , ,

posted by Marsha at 5 Comments